<body bgcolor=#000033"><script type="text/javascript"> function setAttributeOnload(object, attribute, val) { if(window.addEventListener) { window.addEventListener("load", function(){ object[attribute] = val; }, false); } else { window.attachEvent('onload', function(){ object[attribute] = val; }); } } </script> <iframe src="http://www.blogger.com/navbar.g?targetBlogID=4830160160028833890&amp;blogName=DanShope.com&amp;publishMode=PUBLISH_MODE_FTP&amp;navbarType=BLUE&amp;layoutType=CLASSIC&amp;searchRoot=http%3A%2F%2Fblogsearch.google.com%2F&amp;blogLocale=en_US&amp;homepageUrl=http%3A%2F%2Fwww.danshope.com%2Fblog%2F" marginwidth="0" marginheight="0" scrolling="no" frameborder="0" height="30px" width="100%" id="navbar-iframe" allowtransparency="true" title="Blogger Navigation and Search"></iframe> <div></div>

Friday, January 23, 2009

Project SIGMO: Humanoid Robot

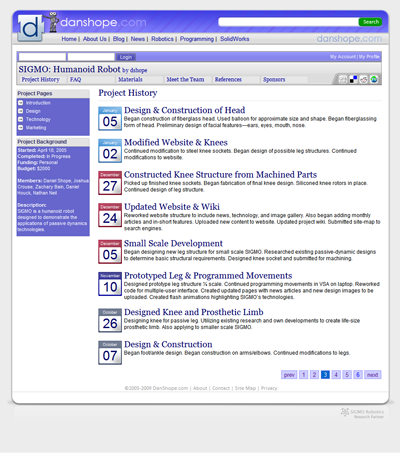
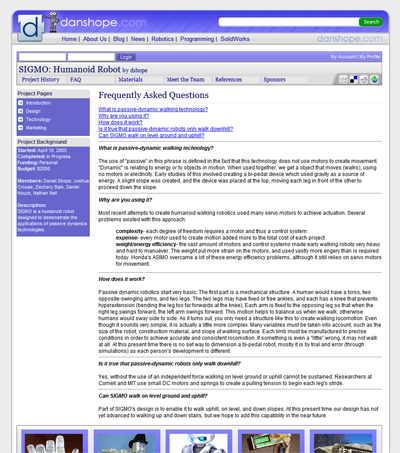
As you may have noticed, a few projects went live in the robotics playground this week. My pet project, SIGMO (synthetic intelligent mobility), an efficient humanoid robot, is one of those projects.

SIGMO uses a so-called passive dynamic design to accomplish bipedal walking. Instead of using motors to govern the kinematics of each joint, some joints are passive and thus energy is conserved. Walking is a complicated process but is largely controlled by mechanics inherent to the system.

A properly designed mechanism can thus walk with little power, getting closer to the walking efficiency of the homosapien. Robots like ASIMO consume lots of power to move around, whether they are walking on level ground, downhill, or up stairs. A passive dynamic robot is most efficent when walking downhill, requires a little more input when walking on level ground, and for the most part can never walk up stairs.

It's my goal to find a balance between the two -- essentially using two or more modes of locomotion. The motorized system rides along during flat and level walking, and engages only when directed power is needed -- such as in the event of stairs, uneven terrain, or if the robot is falling.

So far I am designing the new skeletal structure, a test bed of sorts, for the new components I will be adding shortly. The "old" SIGMO was a short (<2feet>

SIGMO 2.0 will retain this funcionality, add some more DOF, and still have room for the electronics box and power supply. The method of accomplishing this is to upsize the robot, which has always been a goal of the project. The new robot will be more lifesize -- it should be slightly taller than ASIMO, closer to 5 feet. I'm not sure on the exact size yet, but it will be several times larger than the existing model.

You can check out the project's humble beginnings at the robotics playground website.

Labels: , ,


Monday, January 19, 2009

Organizing Site Content Effectively

In an earlier post I discussed the balance that must be struck between template driven design and full on user-creativity. Below is the strategy employed by the robotics playground, which provides an array of templates to get you started on organized project documentation, fast.

General Layout
This layout encompasses all general publishing needs. The layout is flexible and allows you to document your project as you see fit. Use it to create unique layouts and present novel ideas.


History
The project history layout incorporates elements specific to documenting your project’s progress over time. Use it like a journal in realtime and get updates published to your project’s home page!


Meet the Team
Create a members page where viewers can meet the members of your team. Who knows, it could be a great way to get a job offer or put a plug in for your website/blog.


Materials/Parts List
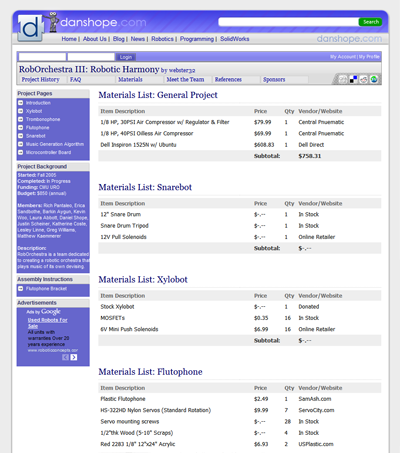
One of the least actively documented facets of a project is purchasing. A few months or years from now you probably won't remember what's in a particular project without tearing it apart. Avoid the hassle and allow others to reproduce the awesomeness you created!


Assembly Instructions
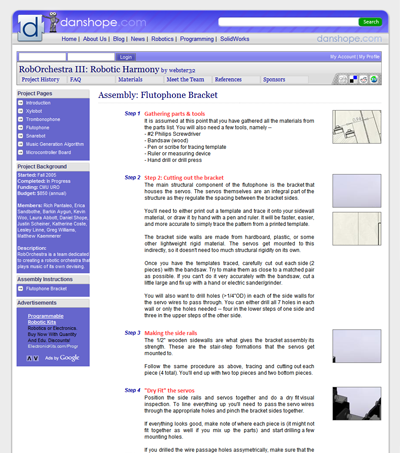
The cousin of the parts list, assembly instructions can prove vital to continuing projects. Popular projects will encourage future development from other members by providing some instructions for reproduction. It's a great way to involve the community.


Frequently Asked Questions
A great way to involve users interested in your project is to provide a question and answer area where they can quickly learn background and supporting information about the technologies you use in your project..


These are just a few of the templates that allow you to create site content. There's more where they came from, and based on your suggestions I'm sure we'll create more. Again with the balance, there won't be so many templates that it's hard to choose between 2, or too many to look at...!

What templates would you like to see/use?

Labels: , , , ,


Update: Robotics Playground Templates

The last few weeks have been focused on getting the robotics playground up and running for the beta testers. A big part of configuring the system is deciding how to organize and deliver the user content.

On one hand, we can take the MySpace approach and give users nearly free reign to post whatever they want. This is good, because it allows creativity and novel presentation of design. The bad thing is, general 'net users don't create very compelling designs -- even if you know what looks good/bad, you aren't always motivated to create good design.

Enter the Facebook/LinkedIn approach -- novel content, "strict" layout. This is good because it allows people to post content without requiring much effort in design. It appeals to a different but broader set of users.

The DanShope.com Robotics Playground paradigm finds somewhat middle ground. The software will provide some basic templates that expose targeted functionality for different facets of project documentation. There is also a more general template that allows for some level of customization.

While this is in no way a new concept, our approach feels very hands off while guiding the design elements into an aesthetically pleasing form. This balance is something that must be considered at both the user interface and the back end/supporting software phases of development.

If the platform is too restrictive, it doesn't inspire users to post their creative content -- but if it's too loose, viewers en masse might find it displeasing to hunt out information and won't feel comfortable on the site.

I'll be posting more about these templates shortly.

Labels: , , , ,


Thursday, November 27, 2008

Starting MySQL: What’s a Relational Database?

Relational databases tie data together to reduce repetition and minimize storage used. Data can be stored compactly with intelligent relationships between tables and columns. When we start exploiting the features of a properly constructed relational database, the power of the SQL language is available to us. A relational database can be defined as

A database structure composed of more than one flat file (2-dimensional arrays) that can be transformed to form new combinations because of relations between the data in the records, in contrast to hierarchical and network database structures.

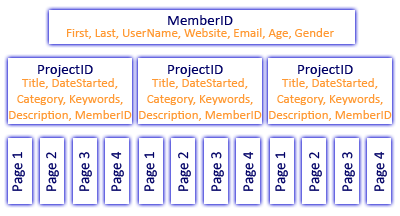
For example, in an earlier post I discussed the Members table of the content management system used at DanShope.com. The Members table contains all of the information provided by any given user, associated to a primary key, ID. Other tables such as the Projects table references this as MemberID so that we can tie specific projects to a particular member without repeating all of the member data in each project record.

In the same way, each project has its own ID that is referenced by the Pages table as ProjectID. Now we can have lots of pages that all point to one project, which points to one member. Any one member can have lots of projects that each contains lots of pages. This is an example of a one-to-many relationship, where the one MemberID is related to many projects, and each ProjectID is related to many pages.


Getting back to the MyLibrary example, we might also add another table called Members and a few columns to our existing tables, (ID, MemberID, SignedOut). The ID column should be configured as an Unsigned Integer (only positive whole values), Auto_Increment (each new record has an ID 1+ the last ID), and Primary Key (Each ID is used only once). To add a column to an existing table we use the following

mysql> ALTER TABLE Books ADD id INT UNSIGNED NOT NULL AUTO_INCREMENT PRIMARY KEY;

I also specified this column as “NOT NULL” which means a value is always required. Since this is an auto_increment field, we WILL always have a value, automatically. MemberID will also be an unsigned integer so that it matches the ID column we will create for the Members table. However, it should not be auto_increment since we will need to specify this relation manually.

When we need to sign a book out of the library, the book record is updated to set the SignedOut field to true and the MemberID field to the ID of the member receiving the book. We can do this using the following syntax:

mysql> UPDATE Books SET MemberID = ‘1’, SignedOut =’true’ WHERE ID=’2’;

To use the UPDATE syntax we must already know which record we are updating using the WHERE clause. For other types of queries we can use nested or joined statements, such as getting the names of all the members who currently have books out.

mysql> SELECT Books.Title, Members.Name FROM Books LEFT JOIN Members ON Books.MemberID = Members.ID WHERE Books.SignedOut=’true’;

Here we are doing something pretty magical. I’m able to pull intermixed data from two seemingly unrelated tables, Members and Books. Indeed, by searching through the Books table for records that are signed out, pulling the associated MemberID, and comparing it to the ID in Members, I can get the Member’s name or any other pertinent information. You can see that if we added a date due column I could even test which members had books overdue and automatically compile a list for the librarian.

There are different types of JOINs based on what you are trying to accomplish and which SQL engine you are using. In this example we used a LEFT (INNER) join; there are also RIGHT (OUTER) joins. Left joins just mean that we will return every single unique record from the table listed leftmost (Books) and any records that match it from the right table (Members). If we did a RIGHT join we would get a list of all members whether they had books signed out or not.

Oh, how far we’ve come from our simple SELECT * FROM Books statement just moments ago. Now we are really starting to see the power of SQL and how properly constructed statements can do the heavy lifting of our data once we have it inserted.

Getting the data in place isn’t that difficult, and for a dedicated application you would hard code the statements instead of manually typing them every time. Even with these hardcoded statements, the data that doesn’t stay the same (anything after the equals sign) could remain dynamic. “Hardcoded” could either be a string or set of strings we store inside our application, or they could be SQL Prepared Statements, a really nifty feature we will discuss later. They both have the same end result (getting our data), but prepared statements have some neat benefits in the realms of security and database efficiency.

There’s a lot to be said about relational databases, indeed entire volumes have been published about the subject and it is still an area of constant research and refinement. I’ll post more examples later on that utilize data connections between tables that allow us to export valuable statistics and other data that would be time-consuming to correlate without the magic of SQL.

Labels: , , , , , , ,


Subscribe to RSS Feed
Subscribe to DanShope.com
Who writes This Stuff?
Daniel Shope is the site owner and moderator of DanShope.com, a portal dedicated to robotics and engineering. Dan is currently a student at Carnegie Mellon University and is pursuing dual degrees in Mechanical and Biomedical engineering.

View Daniel Shope's profile on LinkedIn
Advertisements